Here is my little stud-muffin wearing his new tie onesie.
I whipped this up in about 20 minutes, and I am really pleased with it. Once you try your hand at appliques, you will realize the possibilities are endless! I've already dreamed up a handful of ideas for my next iron-on ventures.
Here are the step by step intstructions for this easy project:
Materials:
- Baby Onesie (bodysuit) or tee
- Tie pattern
- Fabric scrap for tie (I cut one to match the size of one sheet of my Heat & Bond)
- Heat & Bond
- Pencil
- Thread
- Sewing machine or hand sewing needle
- Print tie template, or create your own.
- Cut out and trace onto paper backing of your Heat & Bond.
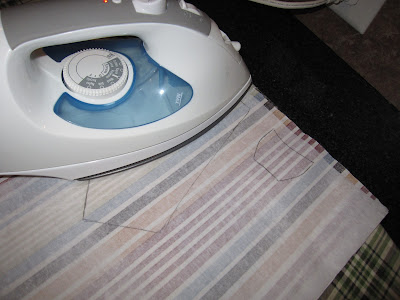
- Peel backing off and lay it on your fabric. Make sure the heat and bond is covering your fabric - it will melt glue onto your ironing surface if it isn't sized right!
- Turn iron settings to cotton & apply dry heat. Follow Heat & Bond instructions on amount of time to iron.
- Cut out your two tie pieces
- Peel back the remaining paper backing and place where you want it on your onesie or shirt.
- (There is usually a little lip at the collar that you can slide the edge of the "top knot" under for a cleaner look.)
- Make sure you position the tie tucked under the knot where you want it.
- Once you like the arrangement, iron until the edges won't lift.
- Admire your cute creation!
*Heat & Bond is permanent and washable, so sewing is not necessary. If you are aren't sewing challenged like I am, at this point you could sew around the tie for a fancier finished look. Go here for a fabulous tutorial.


2 comments:
Do you know where I can find your template?
Yes! Please share your tie onesie when you are done - I would LOVE to see what you make :)
http://tinyurl.com/smithpeastietemplate
Post a Comment